


What You Need to Know Before You Start
Okay, so you’ve got a welding project and maybe you’re thinking about adding some extra flair with custom tail lights. Now, before you dive into that DIY adventure, let’s talk about the realities of welding bed tail lights. It might sound glamorous—imagine sleek, customized lights! But reality often throws a few more obstacles in our way.
Why Welding Bed Tail Lights Is a Bit Tricky
Welding, while fascinating and powerful, can be demanding on your time and skills. One reason why welding tail lights is a bit of a challenge is the skill required to achieve the desired results. The process involves precise control over heat, which requires specific knowledge and experience. Achieving a perfect finish without scorching paint or material is a real art form.
There’s also the matter of getting those dimensions just right. Tail lights are not just about adding some style—they need to be functional. The welding process has to follow the contours of the existing tail light assembly, which can be tricky if you’re not used to working with automotive parts.
Lastly, let’s talk about the potential for mistakes. One small error in your welding technique could lead to a faulty light that won’t function properly. And there goes those hopes for sleek custom lights!
Safety First: A Welding Bed Tail Lights Primer
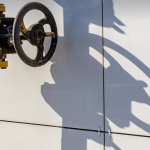
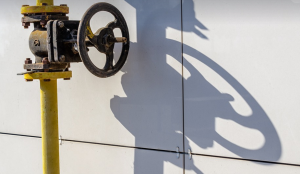
Before we get into the technicalities, let’s talk about safety! Welding is an inherently dangerous process, and it should always be performed with extreme caution.
You need to wear welding gear like a certified helmet, thick gloves, and appropriate work attire. You must also ensure your workspace has proper ventilation and is equipped with fire extinguishers in case of accidents.
Remember, working with high-voltage currents and intense heat poses serious risks. It’s not just about protecting yourself but also the people around you.
Before attempting any welding project—especially on your vehicle’s tail lights—it’s essential to get proper training from a certified professional. Learning from experienced mentors can equip you with the necessary skills and safety knowledge, so you don’t end up in more trouble than good!
The Materials: What You Need for Your Project
You have a project in mind—custom tail lights! These are going to require specific materials. Let’s explore what that entails.
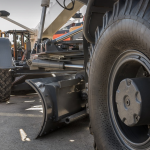
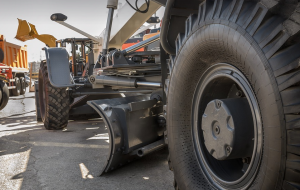
First, you need the right welding metal. For your tail lights, you would use metals like steel or aluminum depending on the style of your tail lights. The choice depends on factors like cost, durability, and how much weight your project needs to hold.
Next, you’ll need to consider the wiring and electrical components—the guts that make those lights function. You can buy pre-made kits for this or explore options for custom building. Your choice will ultimately depend on your budget, level of expertise, and desired functionalities.
Tools: The Essential Arsenal
You’re not just welding metal; you’re working with a complex machine here! You’ll need the right tools to get the job done.
Begin by acquiring essential welding equipment like a welding machine, wire rods, and electrode for your project. You will also need:
- Welding gloves
- Welding helmet
- Ventilation mask
- Safety glasses
- Work shoes with good grip
- Wire cutters
- Multimeter (optional)
- Welding clamps
These tools can help you achieve the desired outcomes, allowing for a smooth welding process.
The Process: Step-by-Step Guide
Here’s a step-by-step guide to getting your tail lights done:
1. **Planning:** Start by carefully researching and sketching your vision for the tail lights. Think about the style, shape, and desired modifications.
2. **Material Selection:** Choose your welding metal and electrical components based on your design and budget.
3. **Preparation:** Clean the surface of your tailgate where you’ll be adding your tail lights. You can use sandpaper to smooth out any rough patches and make sure the surfaces are even and free of debris.
4. **Welding:** Use your welding machine to carefully join your metal pieces together, following a precise path that blends seamlessly with the existing tail light shape.
5. **Electrical Wiring: ** Once your welds are ready, proceed to connect wires for the lights. You may need to solder or crimp joints to ensure proper functionality.
6. **Finishing Touches:** Polish and paint your newly welded tail lights to give them that professional look.
Remember, every project is different. The specifics of your welding process might vary; however, these general steps will help you navigate the journey of creating custom tail lights.
A Word on Costs
Welding tail lights can be a fun but expensive undertaking. There are many factors that influence costs, including:
1. **Complexity:** The more intricate your design and welding skills required for the project, the higher the price will likely be.
2. **Materials:** High-quality metal can be expensive, as can custom wiring harnesses or complex electrical components.
3. **Time:** Welding isn’t a quick fix; it takes time to practice, and the process for your tail lights might take more than just a weekend of effort.
4. **Professional Assistance:** If you lack experience, getting professional help can cost money but save you from potential mistakes, accidents, or delays in completion.
Before diving into any project, it’s wise to research the approximate costs involved and develop a realistic budget for your welding tail lights project.
Final Thoughts: The Custom Tail Light Journey
Welding bed tail lights is a challenging but rewarding experience. It’s a journey that demands patience, skill, precision, and safety as considerations throughout the process. While it might seem intimidating at first, don’t let it discourage you! With careful planning, a good understanding of the tools and welding techniques, and a touch of creative flair, you can create some truly amazing custom tail lights for your vehicle.